Showing posts with label 2nd Saturday State of Your studio. Show all posts

Saturday, March 12, 2011

2nd Saturday State of Your Studio--Cait and Mary are back in the Studio EXPLORING

Yes, Cait and Mary are back in the studio exploring different clays.  This time we are trying out some Frost Porcelain clay.  My first impression is that it is so sticky compared to stoneware.  But as we move along during our session, Cait discovers that she can make very thin buttons with it, that it takes a super good impression and that it is fun to bend and mold.

Some of Cait's buttons.  You can see the fabulous impression from her mold on the ones in the foreground.  And look how thin the little squares are and how nicely they bend.


I am finding too that it bends and molds well.  We have just gotten to the first step in learning about this highly regarded porcelain.  I am going to try a few more ways of working with it before I make a final judgement.

These are leaves, hearts, birds and butterflies  If you get in close on the photo you can see how the clay crumbles around the cuts.  It seems sticky.  When these dry I will see how they sponge up.  And then bisque firing and the exciting part  THE GLAZE.

And to get back to our button and glaze adventure, I just have to share another photo of another one of Cait's scarves with buttons.  These beauties are glazed in Coyote Pam's Blue.  What a lovely old fashioned blue that is.  Kind of a pewter blue, I guess. It sure looks great on this scarf.  You can see a pic of it in Cait's Etsy shop here.

Tuesday, January 11, 2011

2nd Saturday State of Your Studio

Here it is the 2nd Saturday State of Your Studio post by MarshaNeal Studio on the Beads-of-Clay blog.  Now we have a banner we can post on our blog to make it easier for folks to see what we are all doing.  Everyone who wants to participate can, you can be any kind of maker, designer or collector.  The more the merrier.  Just grab the url from this pic by clicking on it and going to properties and copy that address to your blog Gidget editor for pictures and enter it in the web url slot and link it back to the beads of clay.

Here are my goings on in my studio since we last did this.  First a nice vacation over the Holidays.  Then my husband installed new high output  flourescent lights in my studio.  It had been a little dark and shadowy in there with the older, small flouresents.  Of course that was a bit of a mess on top of the mess so I have a lot of clean up to do still. 


Since I have been doing a few new things in the area of explorations.  I have been trying to rivet letter disks to a premade copper bracelet.  See pic below. 


 And turning 1/4 inch copper pipe into toggle bars.  See pics below.


As for plans, I am promising myself I will try out copper clay before the next 2nd Saturday State of Your Studio and have some new beads I am working on ready for display and sale by then too.

Saturday, December 11, 2010

Second Saturday State of My Studio: Cait and Ellie

This is a pic of my ArtBeadScene Ornament Blog Hop entry in progress


I have gradually been getting into the habit of writing a 2nd Saturday State Of My Studio Post to compliment MarshaNealStudio's Beads-of-Clay blog post by the same title.  Hers is an interactive post whereby we can  post a picture link of our studio and then anyone reading the blog post can travel around blog land and see lots of studios, if lots of folks participate.  So that is how this got started.  And this time I have lots to report on since it has been a wonderfully busy time.


Photo of my kiln opening after I fired my 100 hearts order.

Here is a picture of the 100 plus hearts on a plate. 


Here is a good closeup of the buttons and molds Cait made


The highlight of my studio happenings in the last two weeks was having friends over to play in my studio playground.  My friend Cait, known on Etsy as the BarefootWeaver made buttons from clay, her first clay experience since High School.  We used that two part  plastic molding material with buttons from my  collection and she came up with some real  beauties.

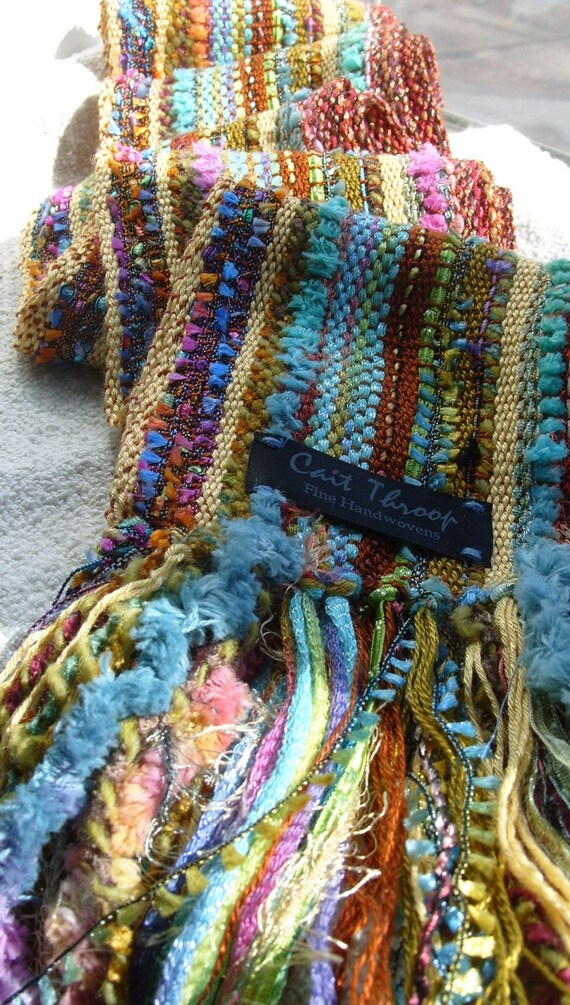
This is a picture of one of Cait's gorgeous scarves from her Etsy Shop.
a closeup of some of Cait's stoneware buttons drying in the food dehydrator

After all the clay work, Cait was intrigued by Ellie's stamping and pounding and wanted to try metal.  Guess what?  It is her  new passion.  She has fallen in love with metal.  Loves the release of pounding the hammer.  Loves the color of copper.  Loves words and letters.  Can you blame her?  She made all of those copper pendants  for her kids and daughter-in-law.


My  friend, Ellie, an artist in her own right, came over to learn how to rivet.  We watched my copy of Susan Lenart Kazmer's video on making rivets and then got to work.  I have a drill press and we used a 1/16 inch drill bit to make the holes and 16 gauge copper wire to make the rivets.  Copper is quite soft so the rivets kept bending over.  But eventually we got them to work out.  She made a lovely copper pendant.  But I am not sure she fell in love with riveting.

Piture of my friend Ellie's pendant.  She riveted the two smaller pieces of copper togther and then riveted them to a large piece of copper.  I love the way she wrapped the wire around the copper washers to attach them to the pendant. 

This is a picture of my custom toggle clasp order for a customer. I made several versions of a toggle clasp to go with this Tall Clover Pendant and then made this photo so she could pick out which one she wanted.  Actually I could have just sent her the one I l iked best, as that was her choice too.  But I love to have options and choices. Some of the ones she didn't choose are in my Etsy shop on sale, along with some other new toggles.

Ellie had to leave early and I forgot to get a picture of all of us.  Cait decided to take one of the two of us and put her camera on delay and set it on a table.  Pretty good results considering....  Me on the left and Cait on the right.


So these are the highlights of what has been happening in my studio since last time I did this.

Monday, November 15, 2010

Re: 2nd Saturday State of the Studio


MarshaNealStudio on the Beads-of-Clay blog posts a 2nd Saturday State of the Studio every month.  We can link to it and show you how are studios are humming along.
This Saturday I am working on some hot pepper beads made from one of the jalapenos I grew in my garden last summer.  It has dried and is now very hard.  So I am trying out the 2 part quick molding compound I have to see what I can come up with.


In another part of my studio I am drying part of my 100 hearts order.  These are in the food dehydrator that is my current favorite tool.  These 2 shelves have about 60 hearts on them.


Here on a piece of plaster board some hearts are getting just hard enough to place in the food dehydrator without the ribs in the shelving making marks in the clay.  That white powdery stuff is baby powder I dip the cutter in before I cut out the heart.  Helps some.

And in my outside studio, my veggie garden, I have recently planted garlic for next summer. It is safely tucked into the ground with a nice covering of straw.

And here is the sunflower I have been photographing off and on all summer and fall.  It is looking truly magnificent on this very beautiful sunny Saturday.
I think we are having a 2nd Indian Summer here in the Northeast while Detroit and Chicago and the Twin Cities are getting an early winter storm.  I am working very fast this weekend to do all those things that need to be done before winter.  This won't last.

Saturday, September 11, 2010

Looking into My Studio Today


I took this picture today so I could participate in the 2nd Saturday State of Your Studio event on the Beads-of-Clay blog.  It shows my glazing area in the front and on the long counter with the green rolling pin, my wet clay working area.  I make sure to keep the two areas separated.  Some folks even have a separate room for glazing to be sure that there are no clay particles floating around that might land in the wet glaze.  My studio is almost below ground level so it is very damp which is good in a way.  The clay doesn't dry out too fast and air may be too heavy for little particles to travel very far.  As you can see I use coffee cans with skewers to suspend the beads while I am glazing them.  In the tray are some bisqued pendants that I will be hand painting and then glazing. 
Thanks for stopping in.

Raku Bead Video Part III